Table of Contents
Configuration by UI
Role packs are created using the UI, accessible by admins using the ttt_rolepacks command. Once a role pack has been created in the UI, it is saved as a folder of .json files in the data/rolepacks folder. Role packs can then be backed up or copied from server-to-server just by transferring those folders.
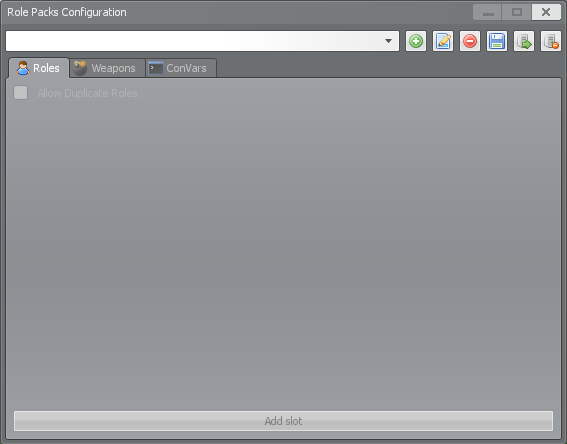
To enable a role pack, set the ttt_role_pack ConVar to the name of the role pack you want to use.
NOTE: If you do this in either 'server.cfg' or 'listenserver.cfg' as detailed on the Configuring ConVars tutorial page, make sure to put the ttt_role_pack ConVar at the bottom of the file. ConVars are read from top to bottom and so any ConVars placed under ttt_role_pack will override ConVars configured through role packs.
Overall
At the top of the role packs window are the overall controls that are available regardless of the selected tab. The components of this section of the window are:
- Role packs dropdown - List of current role packs available on the server. Select an entry from the list to edit it.
- Add button - Creates a new role pack when clicked, first prompting for the name of the role pack being created.
- Rename button - Renames the currently selected role pack, prompting for the new name.
- Delete button - Deletes the currently selected role pack, prompting for confirmation.
- Save button - Saves the changes made to the currently selected role pack.
- Apply to Server button - Activates the currently selected role pack on the server. Resets on server restart or map change.
- Disable Active Role Pack button - Disables the current active role pack on the server.

Roles
The roles tab is where most configuration of the role pack will occur. On this tab, you can create role "slots" which represent a single player in the round. Within each slot you can configure a pool of 0 or more roles for that player to be randomly assigned from. If a slot has 0 roles assigned to it, the normal (e.g. non-role pack) random role selection logic will be used for that slot instead. Each role within a slot can also have a weight assigned to it, making that role more likely than the others to be selected.
Adding a new Role Slot
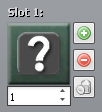
To add a new role slot, click the "Add Slot" button on the bottom of the tab. Once a slot has been added, you will be presented with three buttons:
- Add role button - Adds a new role entry to the role slot
- Delete role button - Deletes the last role entry in the role slot
- Delete slot button - Deletes the entire role slot

Configuring a Role Slot Role
When a new role entry has been added to a slot it defaults to the Innocent role. When this placeholder role is alone in a slot, it behaves the same as if the slot was empty: The player in this slot will have their role randomly assigned by the normal role selection logic.
Two other things to note about the role slot usage:
- If there are more slots than players (e.g., 8 configured slots but only 7 players) than the extra slot(s) will not be used.
- If there are fewer slots than players (e.g., 6 configured slots but 7 players) than the extra player(s) will have their role randomly assigned by the normal role selection logic.
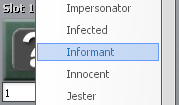
To change the role that the slot belongs to, click the role icon and select the new role from the dropdown.
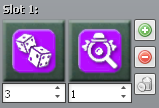
To change the weight of a role (how often this role should be selected relative to the other roles in this slot), change the number in the box below the role icon by typing or using the adjustment arrows.
Role Blocks
This tab is nearly identical to the Role Blocks UI described in the Configuring Role Blocks tutorial. The only differences are the "Use Default Role Blocks" checkbox and the ability for a role to block itself.
Checking the "Use Default Role Blocks" box will cause role blocks configured through the Role Blocks UI described in the Configuring Role Blocks tutorial to also take effect on top of any that are added to this role pack. Leaving this box unchecked means only role blocks configured for this role pack will work.
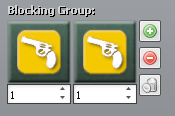
When configuring role blocks for a role pack, it is also possible for a role to be able to block itself. This can be useful if you would like the same role to have the possibility to spawn in multiple slots without the possibility of having duplicates of that specific role. To do this, create a blocking group with only two copies of the same role. Having any other roles in the same blocking group will not work. In the example below it would not be possible for more than one Mercenary to spawn, even if there were multiple slots in which the Mercenary could spawn and "Allow Duplicate Roles" was enabled on the "Roles" tab.
Weapons
This tab is nearly identical to the Role Weapons UI described in the Configuring Role Weapons tutorial. The only differences are the removal of the "Update" and "Close" buttons (which are not needed in this UI), and the rename of the "None" checkbox to "Use Default". All of the functionality in this tab is identical to that in the role weapons UI, except it only takes effect when the specific role pack is enabled. Weapons configured through role packs take priority over role weapons configuration. (e.g. If a weapon is disabled/excluded in role weapons but enabled/included in the active role pack, the role pack will take priority and the weapon will be enabled/included.)
ConVars
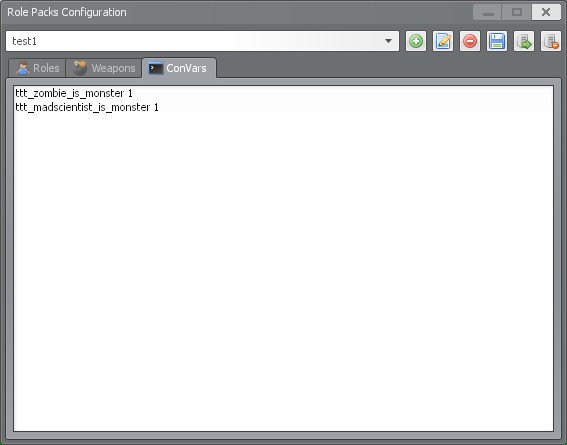
The ConVars tab allows you to specify configuration values to set only when the specified role pack is enabled. Add each ConVar on their own line along with the value you would like to set. You can also add comments by starting a line with '//', but you cannot use inline comments.
NOTE: Some ConVars only take effect after a server restart or map change. In this case you must configure the ttt_role_pack ConVar to load your role pack automatically as described here.